Achieve a Defined Physique: Your Guide to At-Home Toning
Toning: Learn how to tone up at home with effective exercises and a weekly schedule. Build lean muscle and reduce body fat for a more defined look.

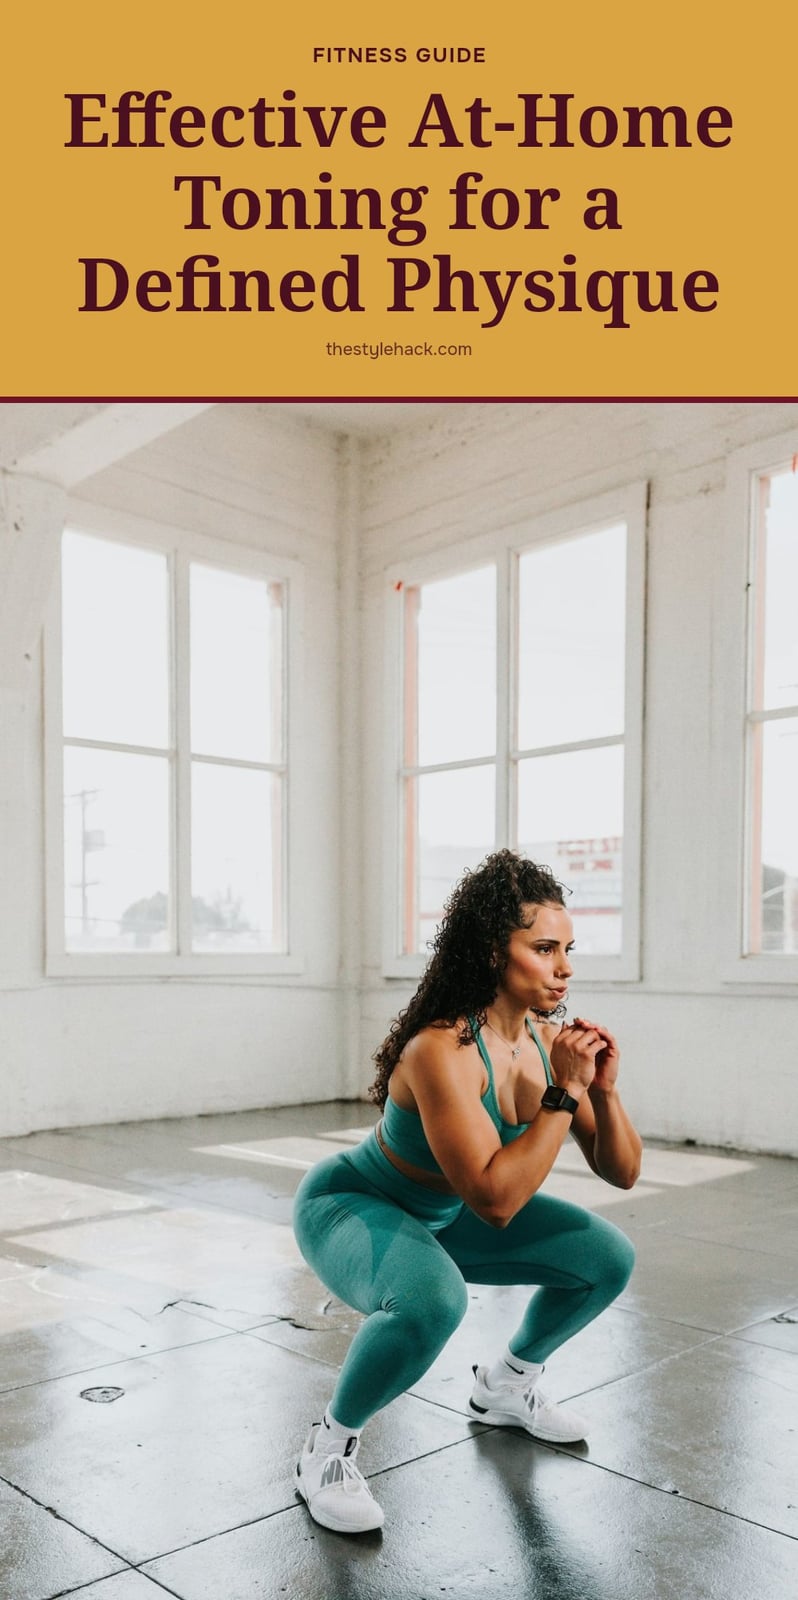
You’ve probably heard that toning is about turning fat into muscle or doing endless reps with light weights. The truth is simpler and more achievable than that. Toning means building lean muscle while reducing the layer of body fat over it, and you can absolutely do it at home with minimal equipment. This article walks you through what toning really means, a full-body workout you can do in your living room, and the nutrition and recovery habits that make it all work.
Key Takeaways
- Combine strength training with cardio to build muscle and reduce body fat.
- Use progressive overload: gradually increase reps, resistance, or difficulty.
- Eat enough protein to support muscle repair and growth.
- Expect visible changes in 4-8 weeks with consistent effort.
- Rest days are essential for muscle recovery and preventing overtraining.
1. What Does ‘Toning’ Really Mean for Your Body?
When I hear the word “toning,” I used to picture some magical exercise that would make my muscles look defined without any effort. That’s not how it works. Toning actually means building lean muscle while reducing the layer of body fat over it, so the muscle becomes visible. You need strength training to build that muscle, cardiovascular exercise to help burn fat, and proper nutrition to support both. The good news is you can do all of this at home with minimal equipment and consistent effort.
2. 1. Warm-Up: Arm Circles and Leg Swings
Start your session with dynamic movements that wake up your joints and increase blood flow. Stand tall and make arm circles forward for 30 seconds, then reverse for another 30 seconds. Follow with leg swings: swing one leg front to back 10-12 times, then side to side 10-12 times, and repeat on the other leg.
- Time: 30 seconds each direction for arm circles, 10-12 swings per leg for leg swings
- Form cue: Keep your torso still and move only your arms or legs
- Make it easier or harder: Smaller circles are gentler; larger circles increase range of motion
My tip: Focus on controlled movements to gently prepare your joints and muscles for the workout ahead.
3. 2. Bodyweight Squats
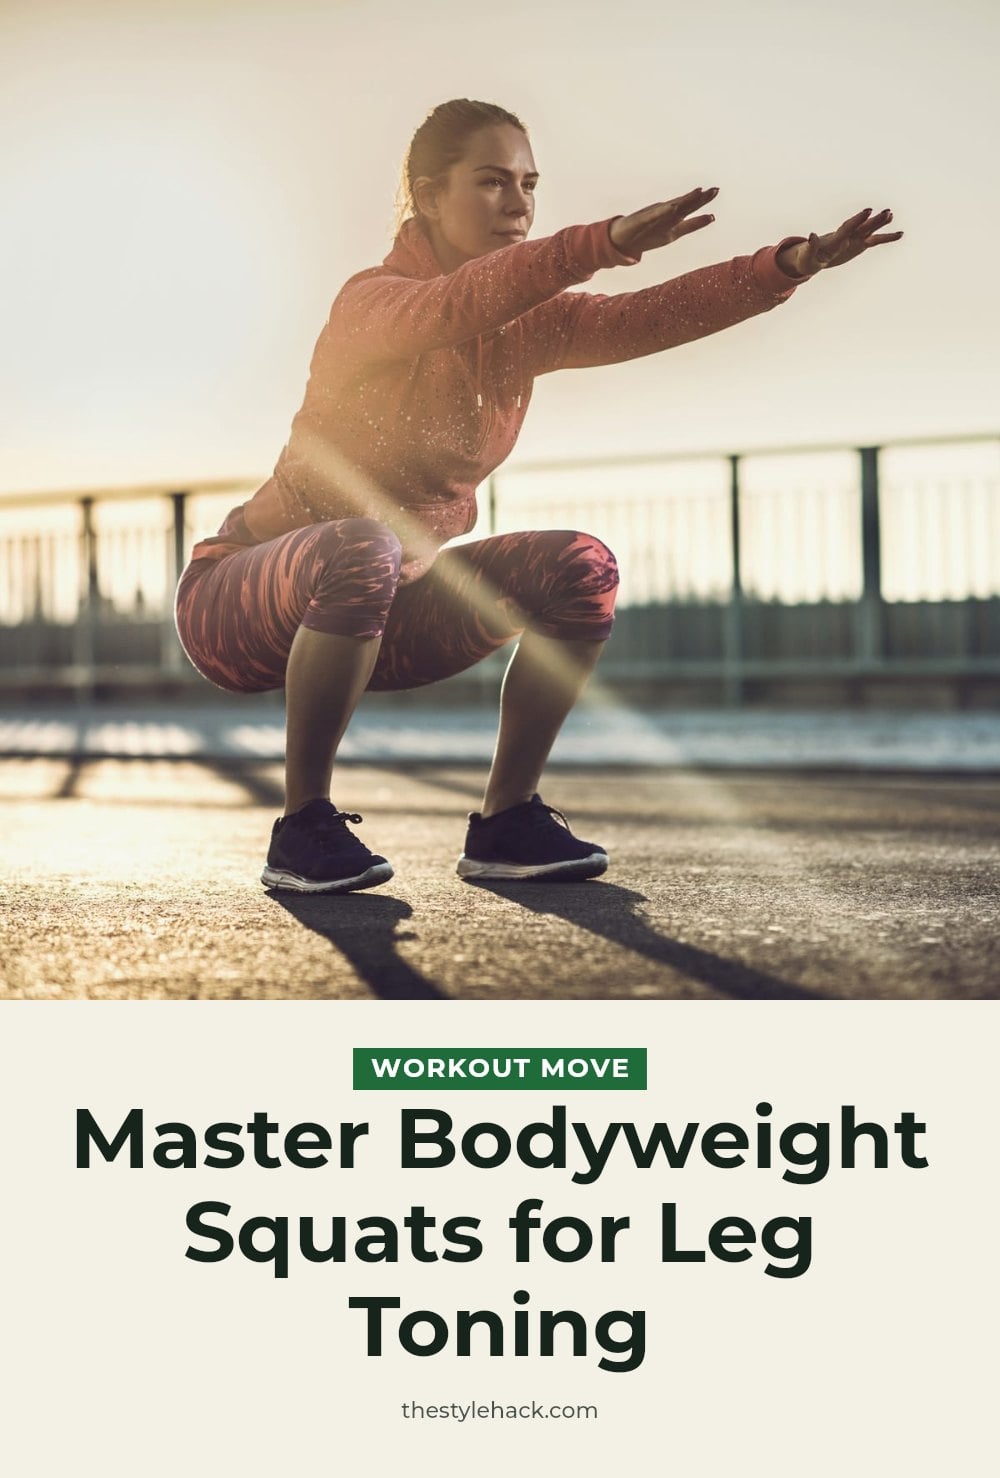
Bodyweight squats are a compound movement that works your quads, hamstrings, glutes, and core simultaneously. Stand with your feet shoulder-width apart, chest lifted, and core engaged. Lower your hips back and down as if sitting in a chair, keeping your back straight and your knees tracking over your toes. Push through your heels to return to standing.
- Sets and reps: 3 sets of 10-15 repetitions
- Form cue: Keep your weight in your heels and your chest up
- Make it easier or harder: Reduce depth for an easier version; add a dumbbell or resistance band for a challenge
My tip: Go as deep as comfortable while maintaining good form; depth increases muscle activation.
4. 3. Push-Ups (Modified or Full)

Push-ups target your chest, shoulders, and triceps, and they can be adapted to any fitness level. Start in a plank position with your hands slightly wider than shoulder-width apart. Lower your chest toward the floor while keeping your body in a straight line from head to heels. Push back up to the starting position. If a full push-up is too challenging, drop to your knees while keeping your torso straight.
- Sets and reps: 3 sets of 8-12 repetitions
- Form cue: Keep your body in a straight line and lower until your chest is just above the floor
- Make it easier or harder: Knee push-ups are easier; incline push-ups (hands on a bench) or decline push-ups (feet on a bench) change the difficulty
Tip: Keep your elbows tucked slightly towards your body to protect your shoulders and engage your triceps more effectively.
5. 4. Walking Lunges
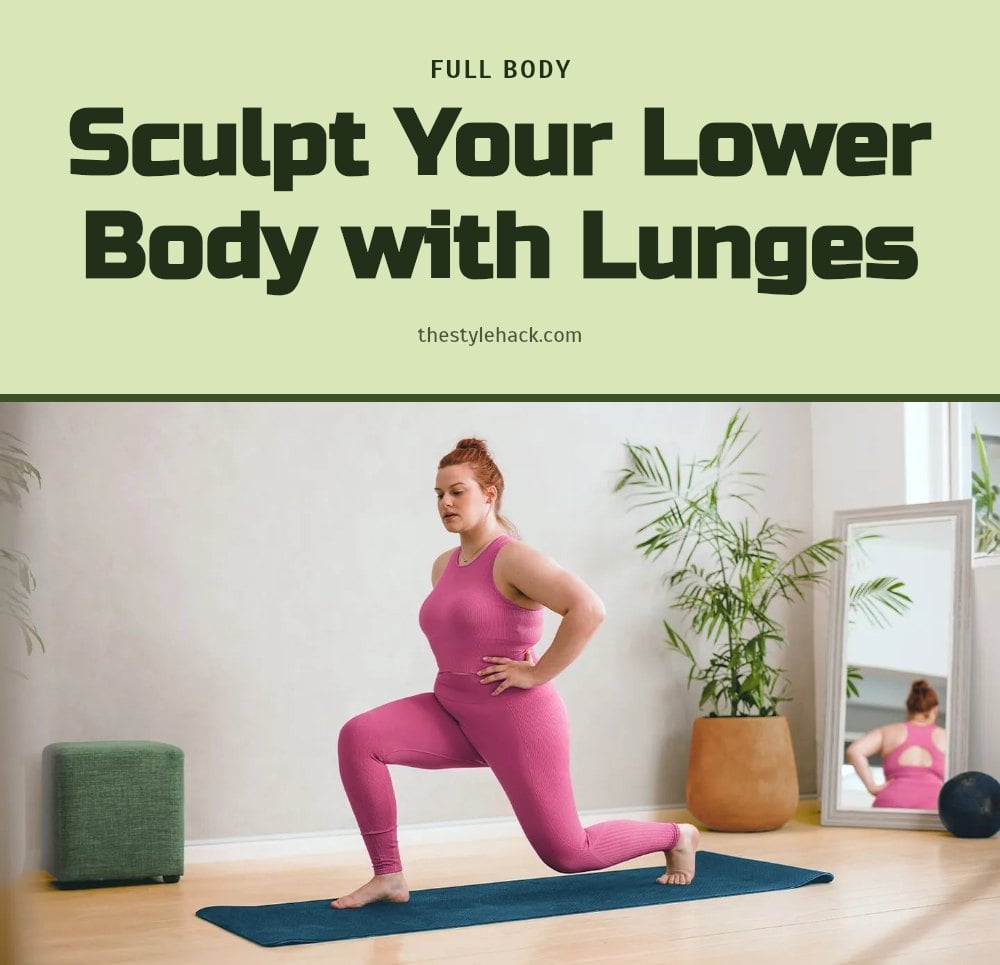
Step forward with one leg and lower your hips until both knees bend to about 90 degrees. Your front knee should stay directly above your ankle, and your back knee should hover just above the floor. Push off your back foot to bring it forward into the next lunge, alternating legs as you go.
- Sets and reps: 3 sets of 10-12 lunges per leg.
- Form cue: Keep your core tight and gaze forward to maintain balance.
- Make it easier or harder: Reduce your range of motion for an easier version; hold dumbbells at your sides for more resistance.
6. 5. Plank
Start in a push-up position, then lower onto your forearms. Keep your body in a straight line from head to heels, engaging your core, glutes, and quads to prevent your hips from sagging or rising too high. Hold this position without holding your breath.
- Time: 30-60 seconds per set, 3 sets.
- Form cue: Imagine pulling your belly button toward your spine to maximize core engagement.
- Make it easier or harder: Hold the plank on your knees for an easier version; extend one leg or add a shoulder tap for a challenge.
7. 6. Dumbbell Rows (Single Arm)
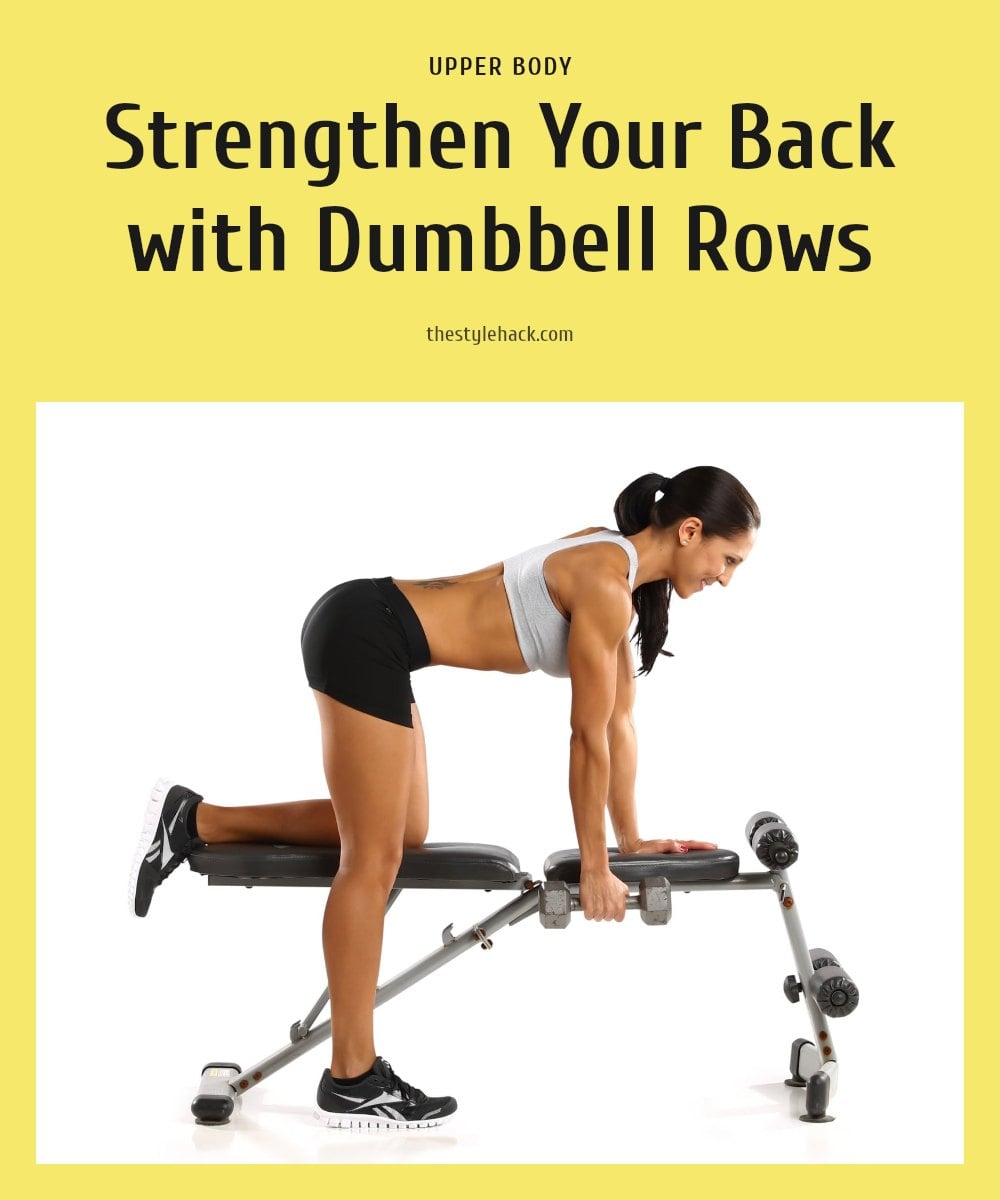
Place one hand and the same-side knee on a sturdy bench or chair, keeping your back flat and parallel to the floor. Hold a dumbbell in the opposite hand, letting it hang straight down. Pull the dumbbell up toward your chest, squeezing your shoulder blade, then slowly lower it back down.
- Sets and reps: 3 sets of 10-12 repetitions per arm.
- Form cue: Avoid twisting your torso; the movement should come from your back and arm, not your hips.
- Make it easier or harder: Use a lighter dumbbell or no weight for an easier version; increase the weight for more challenge.
8. 7. Glute Bridges
Lie on your back with knees bent, feet flat on the floor hip-width apart, and arms by your sides. Engage your glutes and lift your hips until your body forms a straight line from shoulders to knees. Squeeze your glutes at the top, then slowly lower back down.
- Sets and reps: 3 sets of 15-20 repetitions.
- Form cue: Drive through your heels to maximize glute activation and minimize strain on your lower back.
- Make it easier or harder: Perform the bridge with both feet on the floor for a standard version; lift one leg off the ground for a single-leg bridge to increase difficulty.
9. 8. Cool-Down: Gentle Stretches
Finish your workout with 5-10 minutes of static stretching. Hold each stretch for 20-30 seconds, focusing on the muscles you’ve worked. Include stretches for hamstrings, quads, chest, and back.
- Time: 20-30 seconds per stretch, total 5-10 minutes.
- Form cue: Move slowly into each stretch until you feel a gentle pull, not sharp pain.
- Make it easier or harder: Use a towel or strap if you can’t reach your toes; deepen the stretch only as your muscles relax.
Good to know: Breathe deeply into each stretch, never forcing a position that causes pain.
10. Essential Gear for Your At-Home Toning Workouts
You don’t need a full home gym to get started. A few basic items make a big difference for comfort and progress.
- Yoga mat: Provides cushioning and grip for floor exercises like planks and glute bridges.
- Resistance bands (various strengths): Add challenge to squats, rows, and glute bridges without taking up space.
- Dumbbells (light to medium weights): Essential for progressive overload as your muscles adapt.
- Sturdy chair or bench: Supports dumbbell rows, step-ups, and elevated push-ups.
- Comfortable athletic shoes: Offer stability and support for lunges and warm-up moves.
11. Your Weekly At-Home Toning Schedule
This schedule combines strength training with active recovery and rest days. Adjust intensity and duration based on your fitness level and how your body feels.
| Day | Workout | Notes |
|---|---|---|
| Monday | Strength: full body (squats, push-ups, rows, glute bridges) | 3 sets of each exercise |
| Tuesday | Cardio: 20-30 min brisk walk or jog | Keep it moderate |
| Wednesday | Strength: full body (lunges, plank, rows, glute bridges) | Focus on form |
| Thursday | Active recovery: gentle yoga or stretching | Listen to your body |
| Friday | Strength: full body (squats, push-ups, lunges, plank) | Try adding one more rep per set |
| Saturday | Cardio: 20-30 min jump rope or cycling | Or any activity you enjoy |
| Sunday | Rest | Let your muscles recover |
12. Frequently Asked Questions
13. How long does it take to see toning results?
Most people begin to notice changes in muscle definition and body composition within 4 to 8 weeks of consistent training and proper nutrition. Significant transformation typically takes 3 to 6 months or longer. The timeline depends on your starting point, workout intensity, diet, and genetics. Consistency matters more than perfection, so stick with your routine and give your body time to adapt.
14. Can I tone up without weights?
Yes, you can absolutely tone up using bodyweight exercises like squats, push-ups, lunges, and planks. These movements build muscle and can be made more challenging by increasing reps, slowing down the tempo, or adding resistance bands. The key is progressive overload, gradually making the exercise harder so your muscles keep adapting. Bodyweight training is effective for beginners and can be scaled for advanced fitness levels.
15. What is the best diet for toning?
There is no single best diet, but a balanced approach works well. Focus on whole foods like lean proteins, vegetables, fruits, whole grains, and healthy fats. Prioritize protein to support muscle repair and growth, and stay hydrated for metabolism and performance. Eating in a slight calorie deficit can help reduce body fat, but avoid extreme restrictions. Consistency in both diet and exercise is what delivers results.
16. How often should I work out to tone my body?
For most people, strength training two to three times per week is effective, with cardio on the other days. The sample schedule in this article suggests a full-body strength session on Monday, cardio on Tuesday, and so on. Listen to your body and include rest days to allow muscles to recover. Overtraining can hinder progress, so balance is key. Adjust frequency based on your fitness level and recovery.
17. Final Thoughts
My tip: start with two or three strength sessions per week and add cardio on the other days. Keep a simple log of your reps and weights so you can see progress and know when to bump up the challenge. Realistic results take time, usually 4 to 8 weeks for the first visible changes, so be patient and stay consistent. You don’t need a gym to feel stronger and more defined, just a mat, some bands, and a little dedication.
This article is for general information only and is not a substitute for professional medical advice. Before starting any new exercise program, especially if you have underlying health conditions, consult with a doctor or qualified fitness professional. If you experience sharp pain, dizziness, or chest pain during exercise, stop immediately and seek medical attention.
More Blog ideas
- How to Heal Chapped Lips Overnight with Simple Steps
- Atomic Habits: 5 Lessons to Build Better Habits
- Hyaluronic Acid for Beginners
- How to Build a Gentle Skincare Routine for Sensitive Skin
- Beat Frizzy Hair: Easy Remedies for Smooth, Shiny Strands
- How to Increase Your Daily Drinking Water Intake
- Washing Hair Mistakes to Avoid and What to Do Instead
- Bleaching Hair Tips for Less Damage
- How to Make Your Body Mist Last Longer All Day
- How to Fix Your Skincare Routine
- Nervous System Regulation Tips
- Vagus Nerve Exercises for Stress Relief